I had a hard time finding the exact shelves i wanted for my Skadis board so i decided to make my own modular system in OpenSCAD.
Some of the driving features behind this design are: Customizable.
For me, its important to easily get the dimensions i need for whatever use case i have which is why i chose OpenSCAD.
Supports large shelves.
Among other things, I use this system to support cereal box dryboxes with shelves that are 240mm x 235mm.
All shelves fit seamlessly together.
Because the width of each shelf is limited to increments of 40mm, we can ensure that all shelves regardless of depth will fit next to each other.
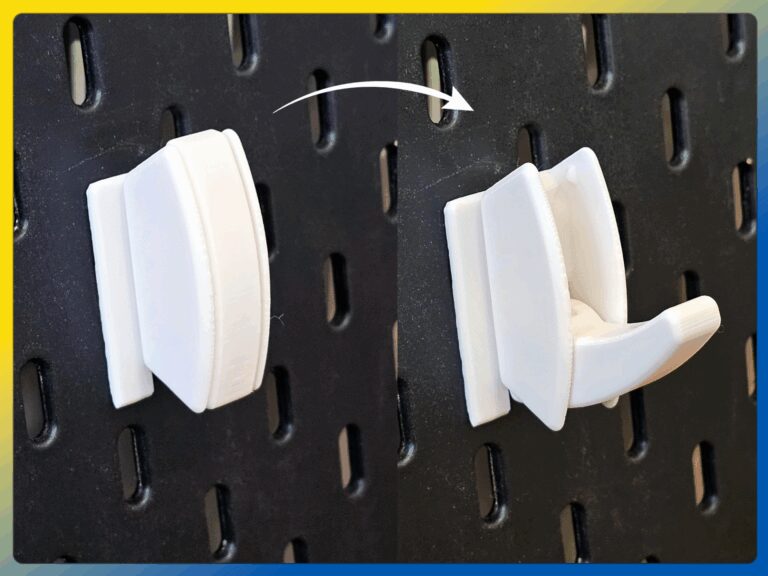
Shelf support legs are valid in all locations on the board.
Due to the calculated spacing of the hexagonal pattern, the top part will fit no matter how the support legs are placed on the board.
This means that you can choose to have the support legs on the outer edge of the shelf or any location between.
This also allows for printing additional legs for a shelf if you want to have extra strength.
Shelves work seamlessly across multiple Skadis boards.
Due to the above properties, all shelves also seamlessly transition across multiple boards Other Features & Tips The number of pegs on the support legs is adjustable by changing the peg count variable, allowing you to add strength or reduce strength if you know you are going to have something heavy on the shelf.
For the cereal box shelves in the picture i used 4 pegs, but in general i stick to 3 as they are plenty strong.
Below is an example of the difference between 3 and 5 peg count in the customizer.
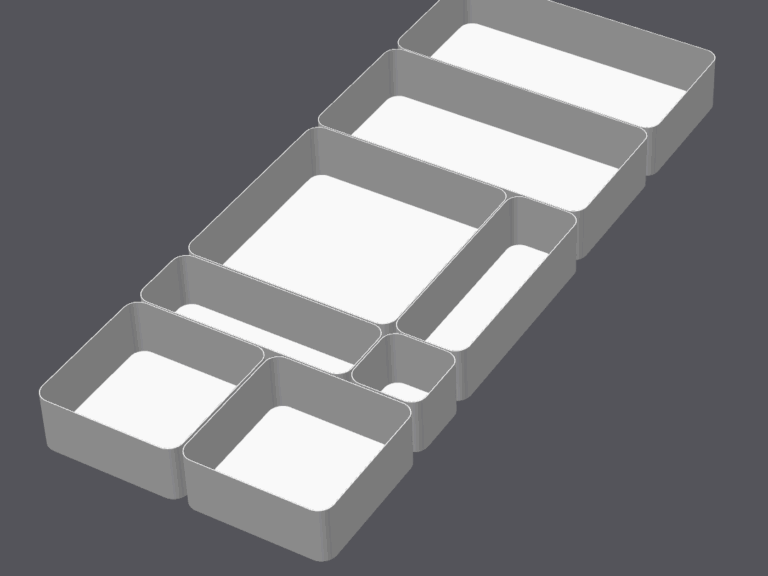
Walls can be added to all sides of the shelf at any height.
This can both be used to create boxes to store items or to add additional rigidity to a long shelf.
For example, adding just a back wall doesn’t add much functionality but can make a very long shelf more rigid if you are planning on placing very heavy items on the shelfs.
I have tested 20kg on a large shelf.
Supports can be placed anywhere on the board that make sense, i generally place them inset to distribute the load, but for smaller shelves it can look nice to have them on the outside.
Below is a picture showing how all support locations are valid.
Print Tips / Settings After exporting from the customizer you just need to Split to Objects→ Auto orient → Arrange items on bed → Add supports → Print